| Home | | | Download | | | | | | | FAQ | | | About Me |
| User Guide | ||||
| Quick Installation Guide | ||||
Installing Binary giis 4.6 : To install giis binary just follow the steps: 1) Change giis directory cd giis_4.6 2) You Should edit config/giis.conf file (If you want to add new directories) before running install_giis.sh. a) With appropriate maximum directory depth. ($LEVEL_VALUE) b) Adding additional directories.($DIR) c) Setting up auto update time ($TIME-by default it's 20 mintues-if you change this auto-update time value, please make sure after installing you edit /etc/crontab file too.corntab entry for giis will be available only after giis installation.) *Both /etc/crontab file and /etc/giis.conf must have same time interval. 3) Run the shell script named 'install_giis.sh', For installation use: sh install_giis.sh 1 UnInstalling Binary giis 4.6 : If you have older giis ,uninstall it using command , "giis -r" #to make sure giis is removed. rm -rf /giis #remove the old config file. rm /etc/giis.conf Please check this out for basic installation (giis 4.6) Installation (file size 4 MB) Sample Recovery using giis Above flash files are created using wink.Thanks for Wink developers.!!! more screen shots are provided below: Note: You can use giis -c or giis -i for installation. The difference is "-c" will use giis.conf file rather than prompting user to select directories during installation. GUI for giis ;) User Guide Screenshots Installing and Configuring giis giis will NOT harm your hard disk. You can use them WITHOUT any fear of losing or corrupting Hard disk.(WITHOUT any warranty too ) Before we begin to explore giis,Please make sure you downloaded latest giis version on your system. OK. Now I believe you got giis at your system.(see giis4.4/README).Let's start with help command.Remember you need to have root privileges for running giis tool. #giis -h will display list of options that can be used. 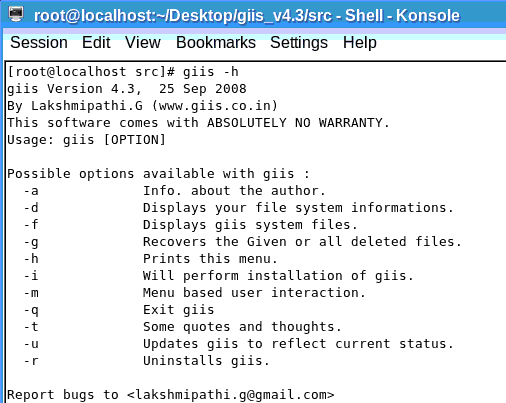 To install use -i option, #giis -i 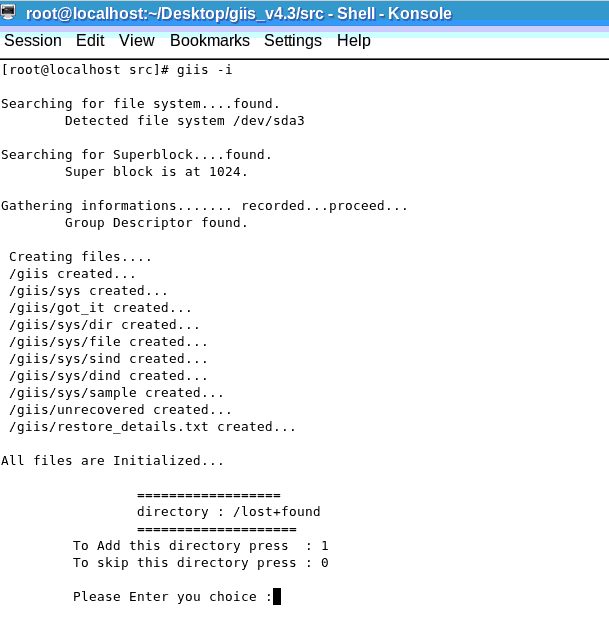 This will start the installation process.By default,giis supports up to 10 levels of sub-directories or directory depth.(like /root/dir1/dir2/..../dir10).when installation begins,it first searches for ext3/ext2 File System in your system and if it didn't find any ext3/ext2 file system,the installation process will be aborted. If everything is fine , it creates giis system files and displays a message "All files are Initialized..." Next comes the important part,giis prompts user whether to protect a directory.(example /etc) If you are not interested in protecting content of specific directory (/etc) and recovering any deleted file from it then press 0 to skip that directory. If you press 1 ,all files found under default directory depth(/etc) is protected by giis and files can be recovered, in case of it accidental deletion. Similarly,User will be prompted for all directory (except root,home) found under / whether to add or skip it. This option allow user to configure giis for his needs. Remember adding unnecessary directories to giis will affect the performance. 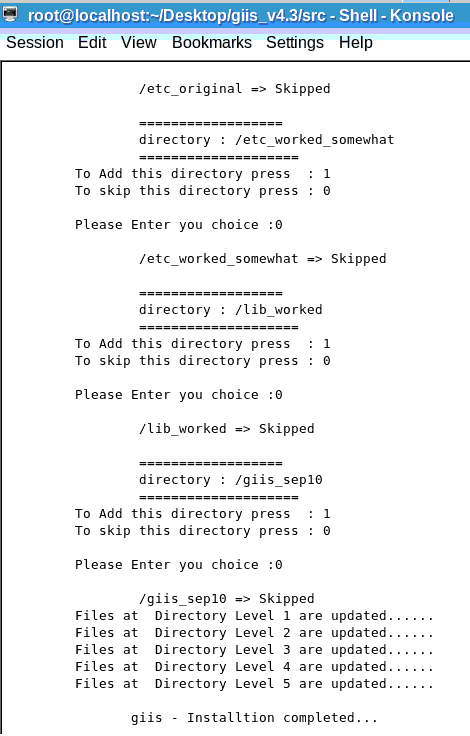 When installation is completed,it will display the message "giis - Installation Completed..."(above screenshot shows giis sample installation up to directory level 5) Recovering Files using giis To Recover Files use -g option, #giis -g 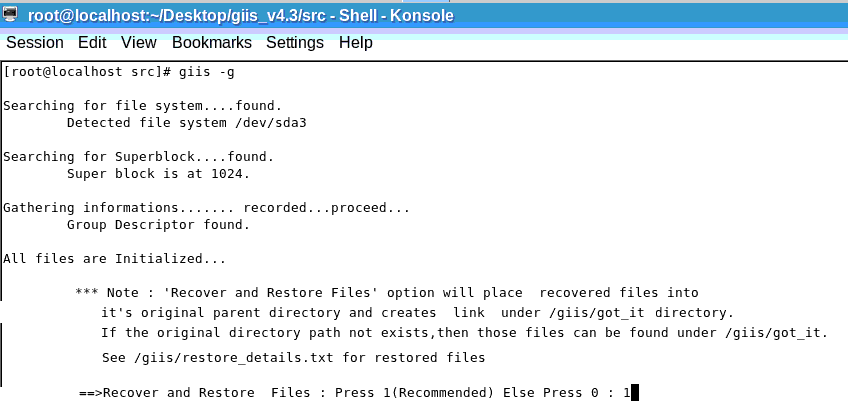 and user will be prompted with "Recover and Restore Files" option ,If you press 1 ,giis will automatically restore the recovered file in its parent directory,if the path exists. 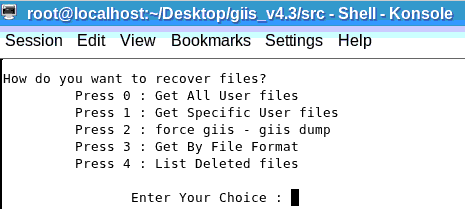 Now user will be prompted with "How do you want to recover files?" , �Recover all files regardless of its owner. �Recover all files deleted by specific user. �Recover a specific file. �Recover files by type. Press 0 for Recovery option: Get all user files This option will allow user to recover all deleted files regardless of owner. Press 1 for Recovery option: Get specific User Files This option will,prompt you to enter user name and recover his files. 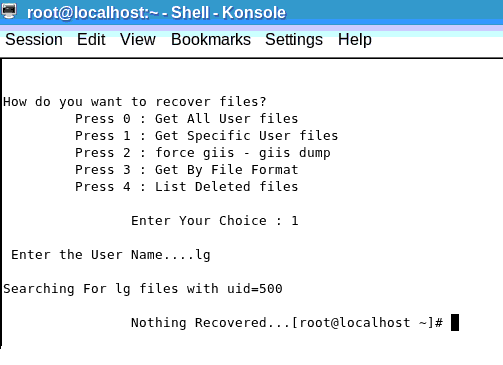 Press 2 for Recovery option: force giis -giis dump (To Recover a specific file) This option will,prompt you to get latest(recommended) or first version. Then enter the exact file name to recover. 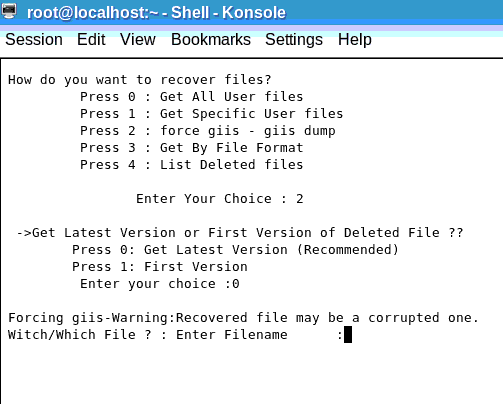 Press 3 for Recovery option: Get By File Format This option will,prompt you to enter file type and will recover files belong to given file type. 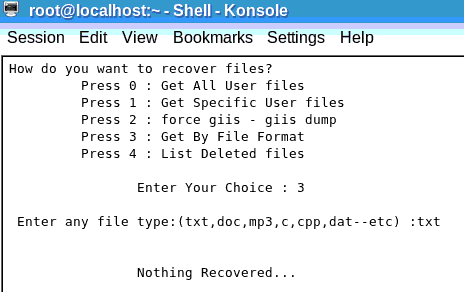 Then Press 4, final option will display list of deleted files. 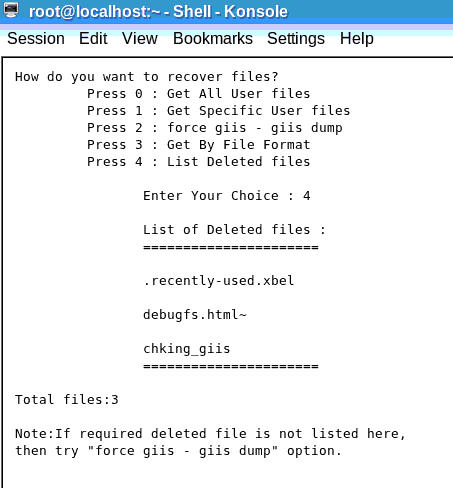 If content of deleted file is modified then giis will alert users-see below image 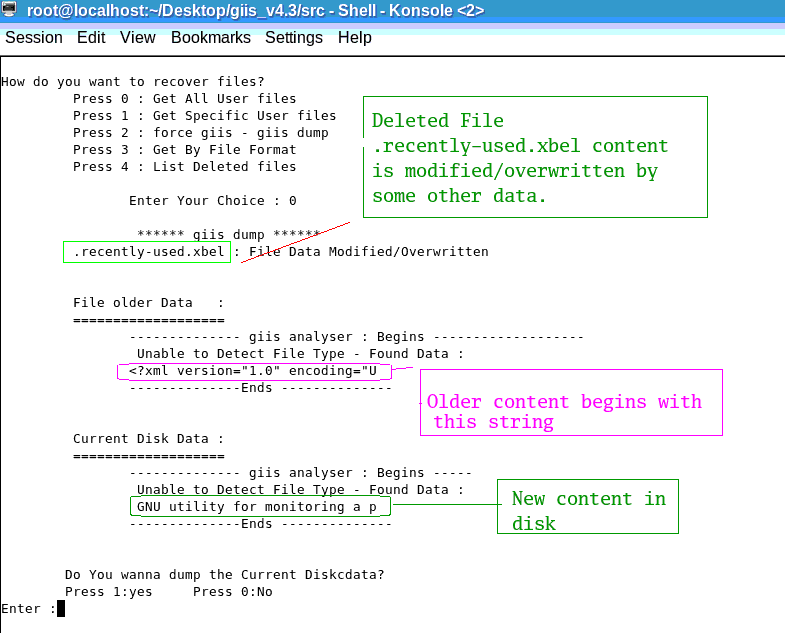 Above image shows the content of file .recently-used.xbel is modified. So giis alerts the user,by displaying files older content and current content available at disk. And prompts the user whether to dump the current disk data or not.giis analyzer is available to detect the content from hard disk by identifying magic signature. 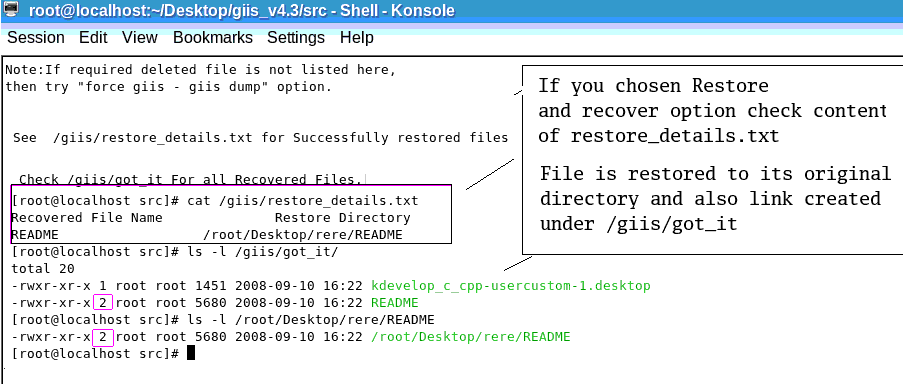 Press 5, for recovery files by deleted date, Get files by Deleted date. 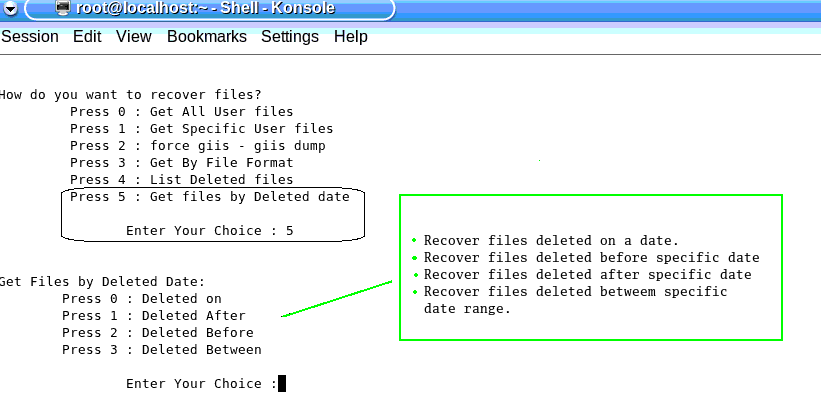 To recover all files deleted on particular date choose option 0:Deleted On. 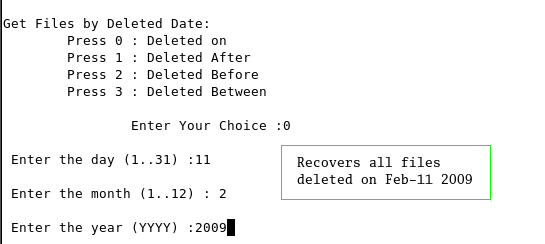 To recover all files deleted after particular date choose option 1:Deleted After. 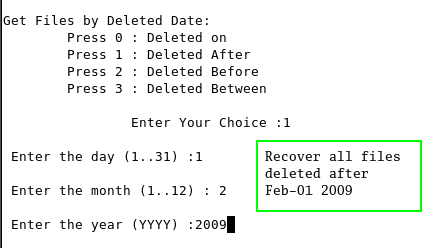 To recover all files deleted before particular date choose option 2:Deleted Before. 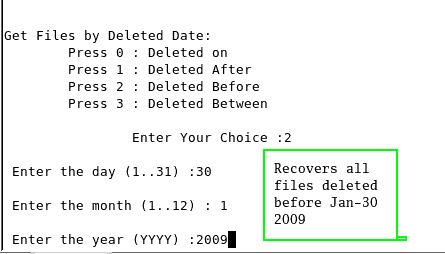 To recover all files deleted between particular date range choose option 3:Deleted Between. 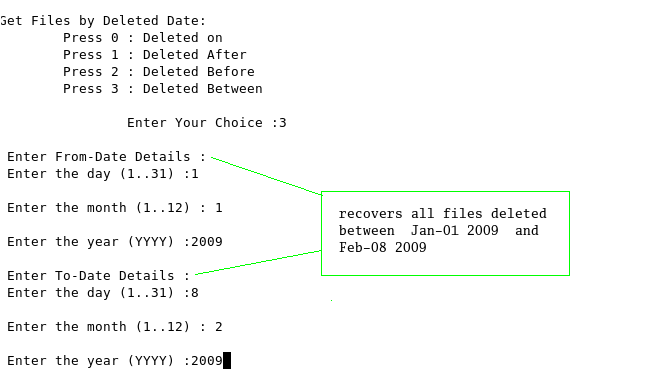 giis recover and restores deleted files with it's original permission and owner bits 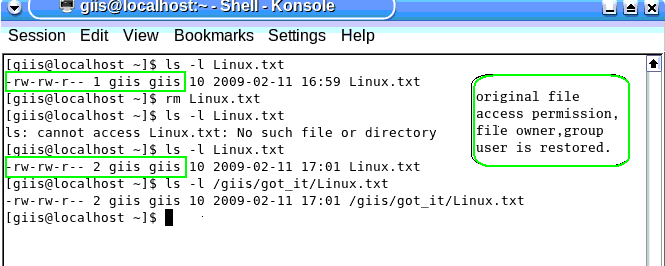 New Restore feature is added to giis,if you have chosen Restore and Recover option,recovered files will be restored back to their directories and link will be created under /giis/got_it. File restore_details.txt will have the list of recovered files which are successfully restored. As you can see in above screenshot,restore_details.txt consist of two information, Recovered file name and it's Restore directory. README is the recovered file which is restored into a directory /root/Desktop/rere. Both /giis/got_it and /root/Desktop/rere directories contain the recovered file,please note that hard links count is two. Whenever new file is created in new your system,it needs to be recorded into giis system files.So giis updates automatically every 20 minutes.You can also update manually using -u option. #giis -u 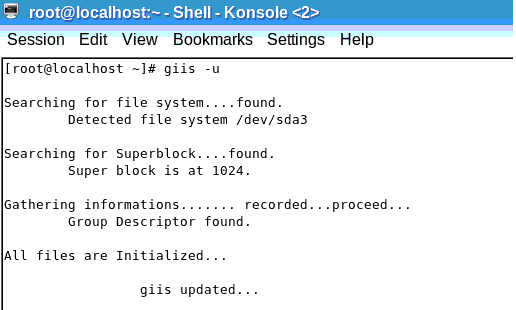 Finally the command you are waiting for,how to uninstall this messy tool? use -r option. #giis -r 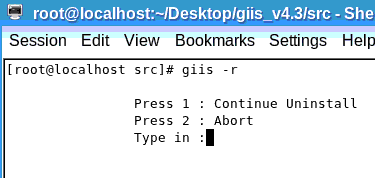 Other options include, � giis -a will give information about author. � giis -d will give your file system information. � giis -f will give details of system files used by giis. � giis -m will provide Menu based user interaction. � giis -q To Exit giis (I guess there is no need of this option) � giis -t Time for some quotes and thoughts. | ||||
Open Source Programmers